THE BEST SELLING PEARLIE PATTERN IS NOW IN WOMEN'S SIZES!
0 Cart
Added to Cart
    You have items in your cart
    You have 1 item in your cart
    Total
    Check Out Continue Shopping

    News — Knit Fabric Patterns

    Tutorial: Dolman Sleeves - How to Tweak Your Pattern to Make Hemming a Breeze

    Tutorial: Dolman Sleeves - How to Tweak Your Pattern to Make Hemming a Breeze

    Dolman sleeves are an easy-sew option when you want more coverage than a sleeveless dress or top without the added time and effort of sewing set-in sleeves.

    This sleeve type is a feature of both the girl's and women's Pearlie Dress & Peplum Top PDF Sewing Patterns.

    Some of you have mentioned that you find it tricky to turn and hem the sleeves when sewing your Pearlies, especially at the base of the armhole.

    If this is your least favourite step (and especially if you are working with a type of fabric that doesn’t allow you to manipulate the area easily) you should definitely give this method a go!

    In this tutorial, I’ve used a regular machine set on a stretch stitch to sew the side seams of the Bodice. The tight corner would make it hard to sew with an overlocker/serger but you could instead finish each side of the Bodice Front & Back with a zig-zag or overcasting stitch on your regular machine before sewing them together. The shoulder seams, skirt seams and neckband can, of course, be finished with an overlocker/serger as usual.

    Also, note that the pattern instructions (for the original gathered skirt Pearlie) have you attaching the Skirt Front & Back to the Bodice Front & Back before sewing the side seams. But in this example, having already sewn the Bodice side seams, I’m going to attach the skirt in the round.

    (Note: if using the circle skirt add-ons for the Pearlie Dress or Top  you would, as per the instructions, be attaching the skirt in the round.)

    Step 1: MODIFY THE BODICE PATTERN PIECES

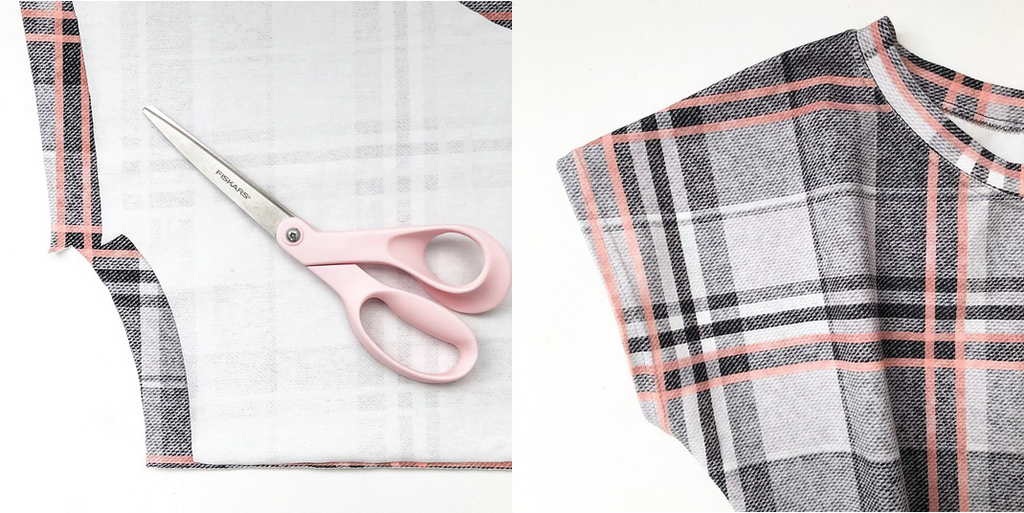
    The Bodice pattern pieces have you cutting the hem allowance horizontally out from the base of the armhole in a straight line. Instead of cutting them in that way, “mirror” the shape at the top of the side seam where it intersects with the armhole in a downward facing “v”. You will need to go 1cm (3/8”) down from the intersection. It would be best to do this by tracing off your pattern pieces with the revised shape and using it as your new template rather than just eye-balling it while cutting!

    Step 2: SEW SHOULDER SEAMS & SIDE SEAMS

    Sew the shoulder seams, finish seam and press.

    Sew the side seams using the stretch stitch on your machine. (You could mark the stitch lines with a soluble marker to help with accuracy).

    Use some sharp scissors to make a small snip half way into the corner of armhole where the stitch direction changes. Press seams out.

    Step 3: PRESS SEAM ALLOWANCE

    Press armhole hem all the way around. The photos shows you what it looks like from the inside.

    Step 4: TRIM EXCESS

    You can snip off the little bits of excess fabric that peep out from under the hem if you wish.

    Step 5: READY FOR HEMMING!

    You can see that the armhole hem allowance is sitting nicely even before stitching. This was our goal here, so YAAY!

    Your armholes are ready for hemming in your preferred way using a single or twin needle or zig-zag stitch.

    Tutorial: How to Adapt Your Pearlie Dress & Peplum Top for Nursing/ Breastfeeding

    Tutorial: How to Adapt Your Pearlie Dress & Peplum Top for Nursing/ Breastfeeding

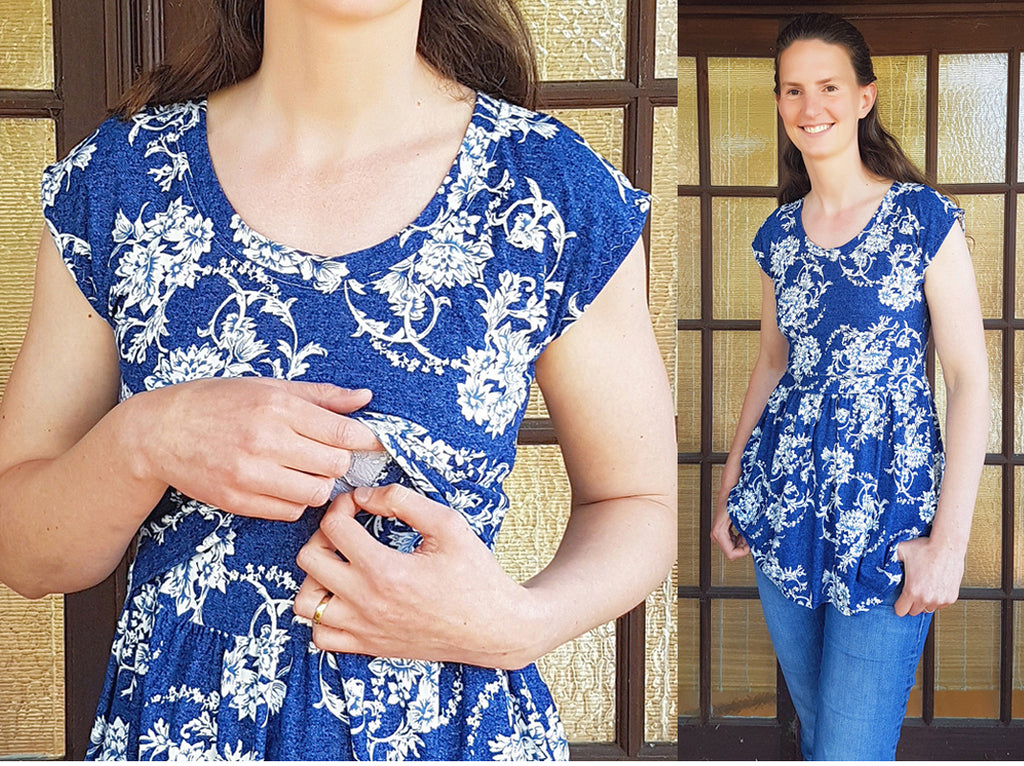
    This modification is the original idea of one of our pattern testers Isaline (@isalinestinystitches). Isaline needed to make her Pearlie Peplum Top nursing friendly and modified the pattern using a clever layering system for the Front Bodice.

    How does it work? There's a layer underneath the Front Bodice with a deep "v" cut-out which attaches to the top of the peplum skirt. The Front Bodice has a horizontal waistband which sits free of the peplum skirt and can be lifted up and away to access the "v" cut-out. 

    Isaline kindly offered to share her tutorial with Peach Patterns customers and put together the following step-by-step instructions so that you can make your own nursing-friendly Pearlie:

    WHAT YOU'LL NEED:

    • The Pearlie Dress & Peplum Top PDF Sewing Pattern for Women;
    • Your fabric. You'll need an extra bodice length of fabric plus about 4" (10cms) to make your inner "v" layer and waistband for the Bodice Front in addition to the yardage set out in the pattern instructions;
    • A pen, ruler, clear elastic and a double sided water soluble sewing tape (Wonder Tape brand for example). The last two are optional but highly recommended for a professional result and to make sewing easier.

    STEP 1: CUT FABRIC PIECES

    (NOTE: if you need to shorten or lengthen your Bodice Front pattern piece to adjust for your height, do this before the steps below).

    • The Bodice Front pattern piece should be lengthened by 1/2" (12mm) at the bottom edge.
    • For the Bodice Front waistband you will need to cut a rectangle of fabric as follows. Measure across the bottom of your Bodice Front and multiply by 2. Multiply again by 0.85 and add 3/8" (1cm) for seam allowance. This is the width of your band. The height of your waistband is 3.5" (9cms). 
    • To make your inner "v" layer take your Bodice Front pattern piece and draw a deep "v" from the inner shoulder to at least 3" (7.5cms) above centre front. (The photo below shows you how to do this). To check that you've got it right, place the pattern piece over your chest. The "v" should finish about 1" (2.5cms) higher than the bottom of your bra.  Draw an additional line from the side of the pattern piece straight up to the shoulder. Fold your pattern piece along the new lines to cut your "v" layer or trace it off onto another piece of paper.
    • All other pattern pieces are unmodified and should be cut as indicated in the pattern.

    STEP 2: SEW ELASTIC TO THE INNER "V" LAYER

    • Place some lengths of clear elastic along the inner edges of the "v" as shown in the first photo below using your double sided tape to keep the elastic in place.
    • Fold the edges of the fabric over to encase the elastic and pin or secure with clips.  You will need to make a small cut into the point of the "v" to help you fold that area.
    • Stitch using a large zig-zag or stretch stitch as shown in the second photo below making sure you don't stretch the elastic as you sew.
    • Finish the sides of your inner "v" layer with an overlocker/serger or zig-zag stitch (optional).

    STEP 3: ATTACH THE WAISTBAND TO BODICE FRONT

    • Fold your waistband in half wrong sides together lengthways and press.
    • Match the middle of the long raw edges of the waistband to the centre front of your Bodice Front and pin or clip the fabric through all layers (see photo below).
    • Sew using your overlocker/serger (or with a stretch stitch), stretching the fabric slightly as you sew to fit across the width. 

    STEP 4: GATHER SKIRT/PEPLUM TOPS AND ATTACH TO BODICE

    • Gather and attach the Skirt Back to the Bodice Back.
    • Gather and attach the Skirt Front to the inner "v" layer.

    STEP 5: FINISH BODICE ASSEMBLY

    • Pin your Bodice Front/waistband right sides together with your Bodice Back/Skirt Back (see first photo below).
    • Pin the inner "v" layer/Skirt Front over the top right sides down (see second photo below).
    • Sew the shoulder seams and side seams through all the layers and finish with your overlocker/serger or zig-zag stitch.
    • Finish the neckband and hem following the sewing instructions in the pattern.

    And that's it! Come over and join us in the Peach Patterns Sewing Group on Facebook to share pictures of your new dress or top.

    Tutorial: Attaching the Front Band on the Peach Patterns "Maple Cardigan for Women" PDF Sewing Pattern

    Tutorial: Attaching the Front Band on the Peach Patterns

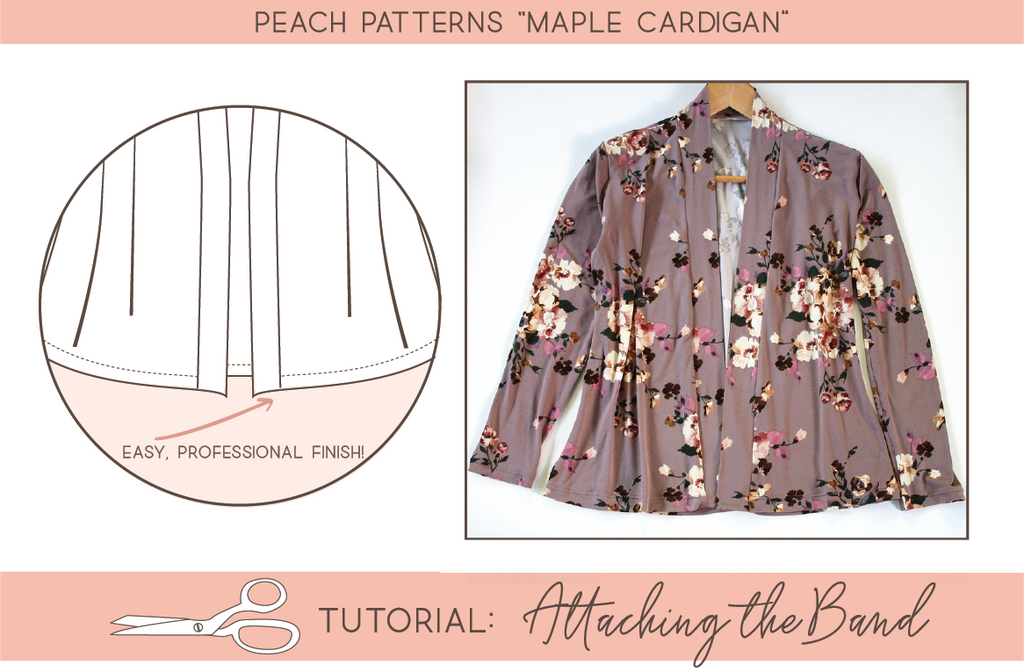
    || The Maple Cardigan for Women PDF Sewing Pattern comes with two options, the Drape Front Cardigan (Option A) and the Banded Front Cardigan (Option B). This tutorial deals with Option B. It shows you how to easily achieve a crisp, professional finish for the band using a method known as "bagging" or "bagging out", which fully encloses the bottom corners (rather than just turning them up and hemming). ||

    Assemble the band and pin (but do not sew it) to the cardigan as set out on Page 6 of the Maple Cardigan Sewing Instructions, matching the band seam with the centre back notch on the cardigan.

    If there is any excess fabric at the bottom edges of your band, trim it so that the band is level with the hem of the cardigan on each side. (Photo 1 below.)

    Unpin the bottom edges of the band from the cardigan a short way up on each side.

    Turn the bottom edges of the band right sides together on each side and sew across the width (horizontally) using a 1/2” (13mm) seam. (Photo 2 below.)

    Trim the seams in half, turn the bottom of the band right sides out on each side and poke the corners neatly into shape with a chopstick or other blunt implement. Press.

    Your band is now neatly enclosed at the bottom and is slightly shorter than your cardigan on each side by the equivalent of the hem allowance. Re-pin the bottoms of the band to the cardigan front. (Photo 3 below.)

    Sew or serge/overlock the band to the cardigan all the way around the front and neckline. (Photo 4 below.)

    Press the seam towards the cardigan.

    Attach sleeves and sew side seams (if you haven’t already).

    Turn up the hem of the cardigan level with the bottom of the band and sew around to finish the hem. Start from the seam where the cardigan front meets the band on one side and sew around to the same point on the other side. (Photo 5 below.)

    Hem at wrists and your beautiful banded cardigan is complete!

    Pattern: Maple Cardigan for Women PDF Sewing Pattern

    Fabric: "Dainty" Double Brushed Polyester Knit Fabric from Lush Fabrics Australia (Hint: If you haven't sewn up one of these cardis with Double Brushed Poly fabric you really should. It's soooooo (!) soft.

    If you have a go at this tutorial I'd love you to share your pictures in our Peach Patterns Sewing Group on Facebook or on Instagram with the hashtags #peachpatterns #maplecardigan

    Peach Patterns "Maple Cardigan for Women" PDF Sewing Pattern: Fabric Resources & Inspiration

    Peach Patterns

    The Maple Cardigan is a classic wardrobe staple that you'll love to make over and over. You can whip up a Maple Cardigan with a relatively small amount of fabric (one and a half metres/yards) and this makes it easy to experiment with different types of fabrics without blowing the budget.

    The pattern calls for a fabric that has a stretch ratio of 20% or more. Two-way stretch is fine, as is four-way stretch (which will give you a somewhat more drapey result). There's a "stretch gauge" in the pattern that will allow you to test a small swatch of fabric before you start.  Or if you are shopping online, check the product listing or contact the seller to ask about the stretch percentage before purchasing.

    The Maple Cardigan pattern test team had lots of fun choosing fabric for their cardigans and you can see some of their creations in my previous blog post. They used a wide range of different knits including spandex jersey, french terry, stretch lace, linen mix jersey, bamboo jersey, double knit/ponte and double brushed poly.

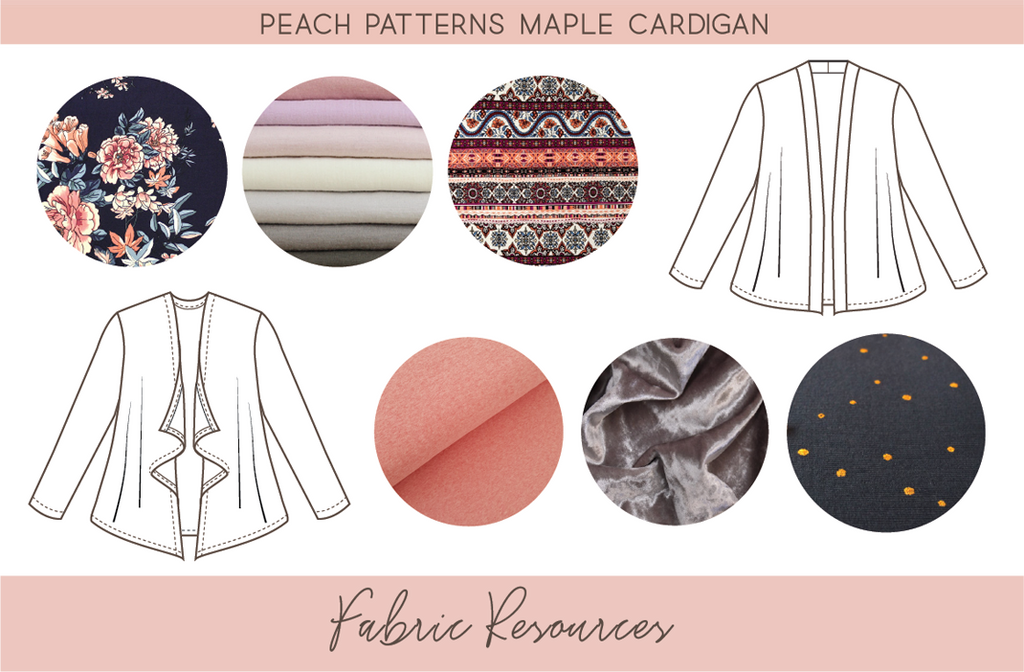
    I had fun rounding up the fabric resources links for this post. I've used some of these sellers and their fabrics to make my own Maple Cardigans (love the drapey Merino wool from The Fabric Store!). I've divided the fabrics into ones that you might choose for the Drape Front cardigan on the one hand and for the Band Front Cardigan on the other. But really, you can mix it up with any of these no matter which of the pattern options you choose to make.

    First up is the very pretty Drape Front cardigan:

    1. Double Brushed Poly from Raspberry Creek Fabrics

    2. Premium Merino Wool from The Fabric Store

    3. Double Brushed Jersey Knit Bohemian from Fabric.com

    And for the classic Banded Front cardigan:

    1. Peachy Pink Melange French Terry/Sweats Knit  from Wicked Fabrics

    2. Crushed Mink Velvet from Tessuti Fabrics

    3. Twinkle Night Sweater Knit from MaaiDesign

    And because it's possible to get such a diverse range of looks out of the Maple Cardigan pattern, why not try one for special occasions with something a little more luxurious like the fabrics below. (Note: the picture of the Gold Sequinned Cardigan below is from Pinterest and was not made from this pattern but you could easily get this look using the Drape Front cardigan option.)

    1. Telio Lux Metallic Knit Stripe from Fabric.com

    2. Telio Stretch Velvet Burnout Circles from Fabric.com

    3. Telio Ornamental Stretch Lace Navy from Fabric.com

    4. Printed Sequin Jersey Knit Natural/Gold from Style Maker Fabrics

    Picture of Gold Sequinned Cardigan above from Pinterest: Link

    That's it for now! I hope you enjoyed this post and that you are inspired to grab the Maple Cardigan pattern and get sewing :)

    Pattern link: Maple Cardigan for Women PDF Sewing Pattern


    Peach Patterns "Maple Cardigan for Women" PDF Sewing Pattern: Pattern Options & Tester Round-up

    Peach Patterns

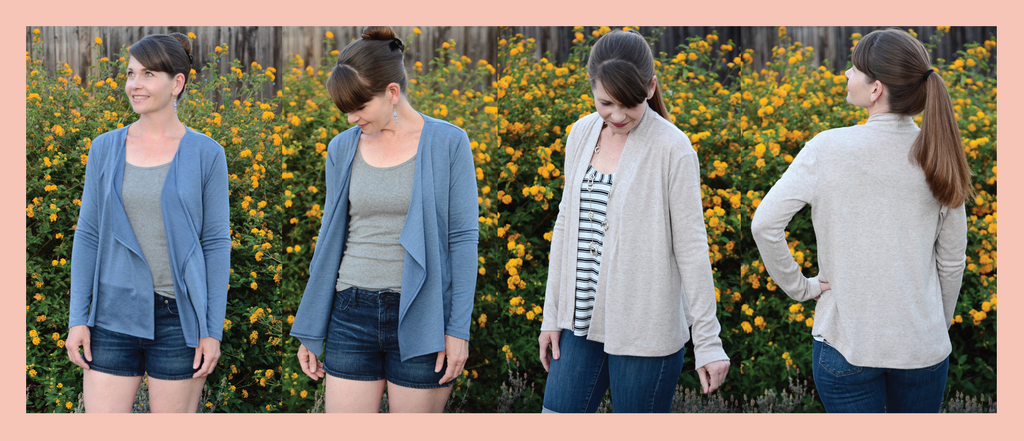
    I'm excited to announce that the Maple Cardigan for Women PDF Sewing Pattern is now available in the Peach Patterns online store. The Maple Cardigan is a hip length cardigan with a slightly dropped shoulder seam and long sleeves. The cardigan is designed with enough ease for comfort and with a flattering, body skimming silhouette. There are two options which you can see below:

    You'll love this easy-to-make wardrobe staple for so many reasons:

    • It's quick to sew and is a great introduction to sewing with knits;
    • There are two great options (a pretty Drape Front Cardigan and a classic Band Front Cardigan);
    • You need only 1.5 metres/yards of fabric for all options/sizes;
    • It looks great in a lighter weight knit for summer/warmer weather (try jersey mixes with linen, rayon, bamboo or modal);
    • It's excellent made up in warmer knits for winter layering (try double brushed poly, stretch velvet, ponte, sweater knits, french terry);
    • Can be made as a casual piece to team with jeans, as a work cardigan over a blouse and pencil skirt or as a special occasion cardigan (try stretch lace or velvet);
    • The "Layers" feature means you can print either the multi-size pattern or only your own size;
    • The pattern is carefully designed to minimise the number of pages required for assembly (and there is also a large A0 format for those who prefer to print on a single page at a copyshop).

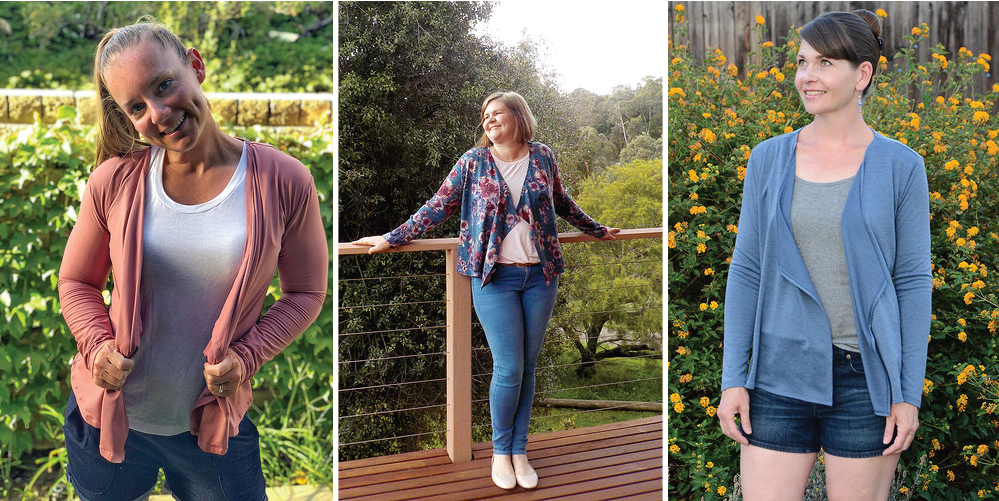
    My testers were so enthusiastic about this pattern and many of them made two or more cardigans during the testing phase (they are addictive once you start!). I'm so thankful to them for their hard work and constructive feedback and you can see their fabulous cardigans here (and check out their social media links for more sewing inspiration).

    Left: Cassie @cmfedewa | Middle: Boon Kuan @limbksews | Right: Karen @poshbotscreations

    Peach Patterns Maple Cardigan for Women PDF Sewing Pattern

    Left: Lauren @threadh2o | Middle: Beck @becksews | Right: Katie @kak513

    Left: Bianca | Middle: Kiaraleigh @chooknduck | Right: Karyn @libbyandmae

    Left: Katie @kak513 | Middle: Siska @_siskamakes_ | Right: Kris

    Left: Kris | Middle: Celine @cookiekhoo | Right: Katie @kak513

    Left: Siska @_siskamakes_ | Middle: Katie @kak513 | Right: Lois @windsorwoollies

    A big thank you to these wonderful ladies! And the pattern link again: Peach Patterns Maple Cardigan for Women.