THE BEST SELLING PEARLIE PATTERN IS NOW IN WOMEN'S SIZES!
0 Cart
Added to Cart
    You have items in your cart
    You have 1 item in your cart
    Total
    Check Out Continue Shopping

    News — Tips & Tricks

    "Mama Leilani Top & Dress": Fabric Inspiration & Resources

    This is the second part of a two part blog series about the Peach Patterns Mama Leilani Top & Dress PDF Sewing Pattern. In this part we're covering everything you need to know to choose the best fabric for your top or dress. The series also covers pattern options, sewing tips, design inspiration and blog reviews in Part 1 (here).

    The key to getting a great finished top or dress with the Mama Leilani pattern is choosing the right fabric. The main feature of the design is the ruffle overlay and in order to create the pretty folds you are aiming for with this feature its important to use a fabric that will behave in the right way when being worn. This is especially so with the women's dress as there is the added consideration that the overlay needs to drape over our curvier figures.

    Rayon

    The rayon fabrics pictured here are (clockwise from upper right):

    Watercolor Burst Rayon Challis in Blue/Coral from Style Maker Fabrics

    Premium Floral Picasso Rayon Poplin from LA Finch Fabrics

    Turquoise Digital Boho Rayon Challis from LA Finch Fabrics

    Ginger Yellow Rayon Fabric by JPFabrics on Etsy

    The favourite fabric choice for this pattern is undoubtedly rayon (also known as rayon challis or viscose) as it will give you the optimum drape and flattering silhouette.  All of the big chain fabric shops and loads of online sellers now carry rayon in a huge range of both prints and solid colours.  Rayon can be a little more challenging to cut and sew than cotton.  The best tip for cutting your pattern pieces when using rayon is to find as large a surface as possible and spend extra time smoothing your fabric out and aligning the selvedges. Use plenty of pins AND fabric weights.  If the fabric does shift a little and you find your matching pieces are slightly different, pin them together and trim them to match before sewing.

    Silk or Crepe

    The silk and crepe fabrics pictured here are (clockwise from upper right):

    Crepe Amaranthe from MaaiDesign

    Designer Silk Crepe de Chine from Cali Fabrics

    Telio Moda Crepe Bird from Fabric.Com

    Savannah Crepe Ivory from Fabric Godmother

    If you are up for a challenge and want to create a pretty, special occasion dress you may want to have a go at using silk or crepe for the pattern.  The advice about cutting and sewing fluid fabrics (see rayon) applies even more here!

    Cotton, Voile or Lawn

    The cotton fabrics pictured here are (clockwise from upper right):

    Paisley Block Print Cotton from IndianStores on Etsy

    Textured Printed Tencel from Spotlight

    Parakeets Cotton Lawn from Fabric Godmother

    Art Gallery Sage Voile Painted Night Desert by Bari J from Fabric.Com

    If you are going with a cotton fabric, avoid any mid weight to thicker cottons such as patchwork, quilting weight cotton and broadcloth. Instead choose soft and light weight options like voile or lawn or tencel. Indian style block print cottons are another fabulous choice as they usually come on a base cloth which is super soft to touch and comfortable to wear.

    No matter which fabric you choose, don't forget to wash and press it before cutting your pattern pieces. Many of the fabric types discussed here will shrink after washing and this is especially so for rayon.

    Adjustable Straps

    Image at left: by Susana of Suco by Susana Image at right: Sew Squirrel

    You won't regret having a go at making a Mama Leilani Top or Dress with Adjustable Straps. It's easier than you think and there's an additional full photo tutorial in the pattern to show you exactly how to do it. Here are some links to suppliers who sell the ring and slider hardware you'll need for this option:

    Australia:

    I have used and recommend Sew Squirrel.

    Textile Traders.

    Europe and the UK:

    English Couture Company

    Evie La Luve DIY

    Studio Costura Shop on Etsy

    North America:

    A search on Etsy for "rings and sliders" and/or "bra making hardware" will bring up several US sellers of these supplies.  Arte Crafts is one we found which offers a good range.

    Another tip shared in the Peach Patterns Sewing Group is to recycle rings and sliders from old bras or lingerie that you’re no longer wearing.

    And that's about it for now! I hope you've enjoyed reading this series and if you make yourself a Mama Leilani Top or Dress please hop over and share it in the Peach Patterns Sewing Group and/or on Instagram with the hashtags #peachpatterns and #mamaleilani.

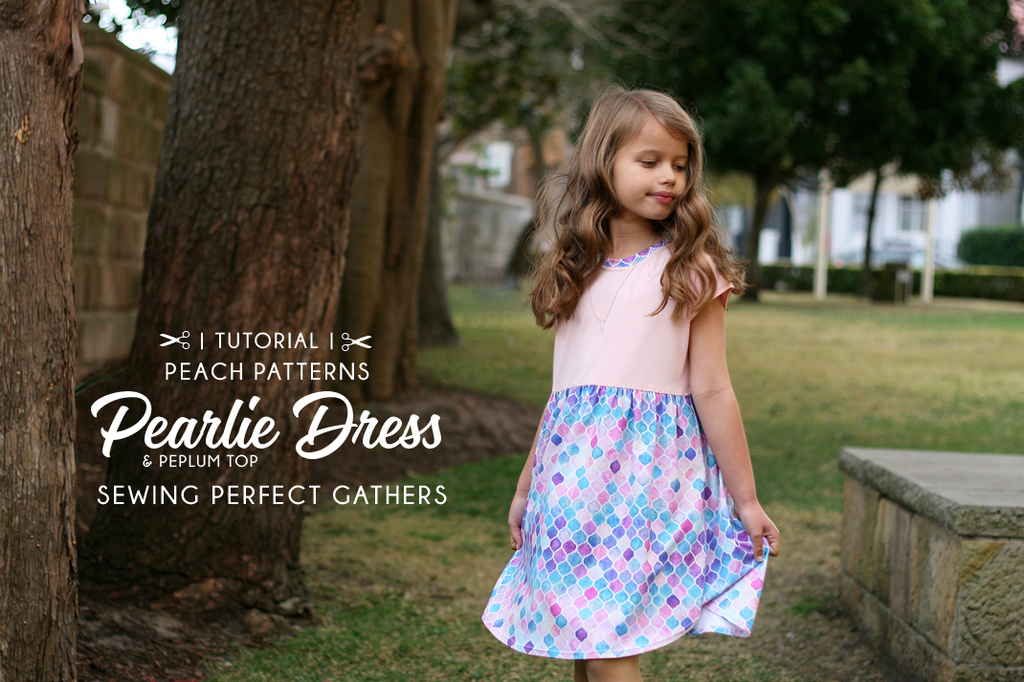
    Tutorial: The "Pearlie Dress & Peplum Top": Sewing Perfect Gathers

    Tutorial: The

    Sewing perfect gathers between the bodice and skirt on your Pearlie Dress or Peplum Top isn't hard and will give your finished dress a truly professional edge.  There are several ways to get nice even gathers when sewing knit fabrics but the one we use in the pattern is a real "game changer" (I'm quoting the Pearlie pattern testers here!).  

    This method is also an especially good confidence booster if you're new to sewing with knits because it's simple and has such great results.

    **** Haven't got your Pearlie Dress pattern yet? Hop over to One Thimble and grab a copy either as a standalone pattern or, better still, as a package with the other great patterns in One Thimble Issue 16. For more inspiration and to see all the amazing Pearlies that have been posted by our lovely customers, join the Peach Patterns Sewing Group and One Thimble Sewing Enthusiasts group on Facebook. ****

    This tutorial outlines the very first steps you will take to sew your Pearlie Dress or Peplum after cutting your fabric pieces. Taking a bit of extra time and care here will set you up for success with the rest of your sewing.

    NOTE: There are two bodice and neckband options in the Pearlie Dress pattern and for this version I used the "relaxed fit" bodice and the "standard" neckband.  The dress was made in a straight Size 8 and the fabric details and links are at the end of the tutorial.

    SO, let's get started:

    ASSEMBLE YOUR SUPPLIES

    The things you'll need are a stretch needle, your regular thread, some shirring elastic and an empty bobbin case. 

    Insert the stretch needle into your sewing machine shank and thread it with your regular thread.  Take the empty bobbin and wind your shirring elastic around it by hand until the bobbin is full.  The idea here is to wind the elastic on firmly but without stretching it too much.  Load the bobbin with your shirring elastic into the bobbin case as you would with regular thread.

    SEW YOUR GATHERING STITCHES

    Set your machine to the longest stitch length.  On the right side of your SKIRT FRONT and BACK pieces sew a row of stitching just under the top raw edge. (Make sure you start (and finish) sewing just over 1cm (3/8") in from the side seams (as marked on the pattern pieces). This will ensure the seam allowances at each side of the dress are free of gathers.  And yipeee (!) you'll notice the fabric will begin to gather a bit as you sew.  The real magic starts, though, when you sew another row of stitching just under the first one.  Hold the fabric as flat as possible without stretching it too much and sew completely parallel to your first row.  Your fabric will gather up nicely - step back to admire!  

    Here are some front and back views of your fabric after this step:

    Your shirring elastic will most likely have done the trick to reduce the width of your skirt pieces to match the width of your bodices.  You can check this by laying the pieces parallel as in the photo below. If they're still too wide, however, simply lay the skirt pieces on your ironing board and give the gathers a few shots of steam while holding the iron just above the fabric (don't press the actual fabric).

    FIND THE CENTRE POINT OF BODICE & SKIRT PIECES

    Fold your BODICE and SKIRT pieces in half and mark the centre of each with a pin as shown in the photo below.

    SEW BODICE and SKIRT PIECES TOGETHER

    A little word of caution here so you don't do what *someone I know* (ahem) once did whilst sewing her Pearlie Dress i.e. sew the BODICE FRONT and SKIRT BACK together.  The SKIRT BACK is the longer of the two skirt pieces and needs to be matched with its partner, the BODICE BACK.

    Taking your SKIRTS and BODICES, match the centre points marked by your pins and aligning the raw edges, pin your pieces right sides together.  I use LOTS of pins and remove them as I sew!  

    (You will notice (as the photo below shows) that the bodice fabric has a tendency to bunch up when it's pinned to the skirt.  Because of this you need to take extra care when sewing over your gathers to keep smoothing out the layer of (bodice) fabric underneath.  If the bodice fabric does double over and get caught in the stitch line, there's no need to unpick the whole seam: simply unpick and re-sew the affected area.)

    Sew your skirt and bodice pieces together just under the second row of gathering stitches. For the sake of precision I use a regular machine to do this step and then finish the seam with my overlocker (serger) afterwards.

    Sewing machine:

    Overlocker (Serger):

    PRESS SEAM UPWARDS

    And that's really all there is to it! After a quick steam and press with your iron (lay fabric wrong side up and press seam upwards with tip of iron), you have gorgeous gathers and (after doing a little happy dance!) can go on to sew the rest of your Pearlie Dress.

    The knit fabrics used for this Pearlie Dress are Art Gallery Solids in Crystal Pink from Bebeloush Designs for the bodice and Rainbow Pastel Watercolor Moroccan by Micklyn on Spoonflower for the skirt. (I chose the Spoonflower Cotton Spandex Jersey as my base fabric for this print).

    Don't forget to grab your copy of the Pearlie Dress sewing pattern over at One Thimble

    One Thimble

    Stay in the Peach Patterns loop and: 

    Follow my blog with Bloglovin

    (This post contains affiliate links.)