Tutorial: How to Adapt Your Pearlie Dress & Peplum Top for Nursing/ Breastfeeding
This modification is the original idea of one of our pattern testers Isaline (@isalinestinystitches). Isaline needed to make her Pearlie Peplum Top nursing friendly and modified the pattern using a clever layering system for the Front Bodice.
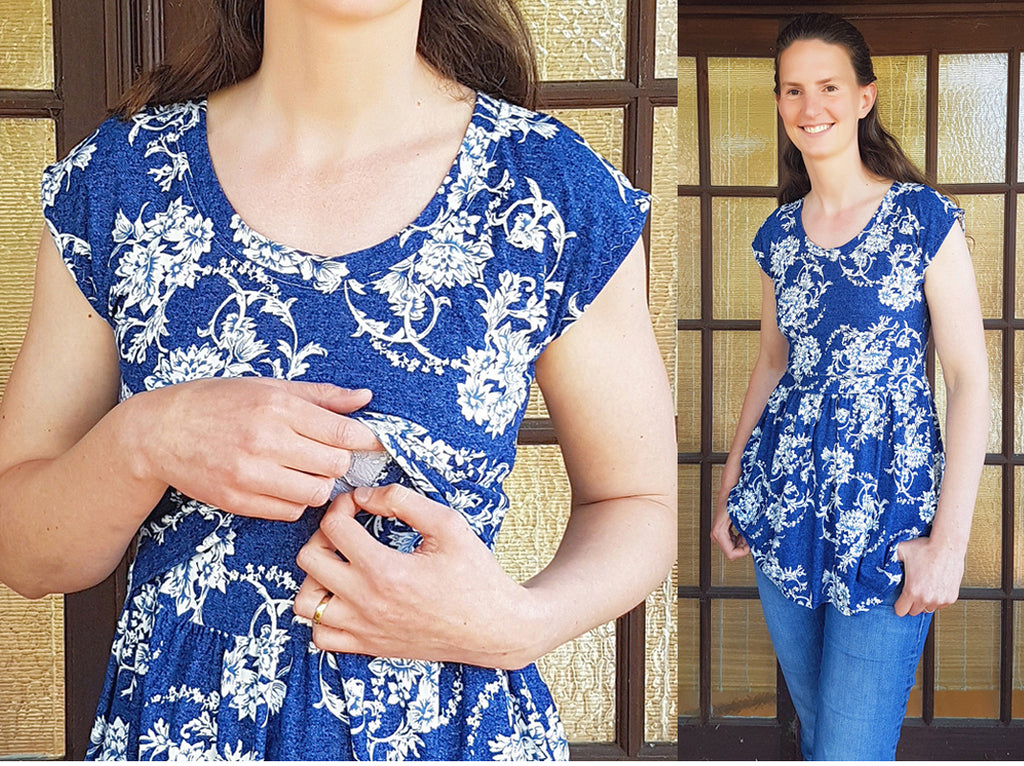
How does it work? There's a layer underneath the Front Bodice with a deep "v" cut-out which attaches to the top of the peplum skirt. The Front Bodice has a horizontal waistband which sits free of the peplum skirt and can be lifted up and away to access the "v" cut-out.
Isaline kindly offered to share her tutorial with Peach Patterns customers and put together the following step-by-step instructions so that you can make your own nursing-friendly Pearlie:
WHAT YOU'LL NEED:
- The Pearlie Dress & Peplum Top PDF Sewing Pattern for Women;
- Your fabric. You'll need an extra bodice length of fabric plus about 4" (10cms) to make your inner "v" layer and waistband for the Bodice Front in addition to the yardage set out in the pattern instructions;
- A pen, ruler, clear elastic and a double sided water soluble sewing tape (Wonder Tape brand for example). The last two are optional but highly recommended for a professional result and to make sewing easier.
STEP 1: CUT FABRIC PIECES
(NOTE: if you need to shorten or lengthen your Bodice Front pattern piece to adjust for your height, do this before the steps below).
- The Bodice Front pattern piece should be lengthened by 1/2" (12mm) at the bottom edge.
- For the Bodice Front waistband you will need to cut a rectangle of fabric as follows. Measure across the bottom of your Bodice Front and multiply by 2. Multiply again by 0.85 and add 3/8" (1cm) for seam allowance. This is the width of your band. The height of your waistband is 3.5" (9cms).
- To make your inner "v" layer take your Bodice Front pattern piece and draw a deep "v" from the inner shoulder to at least 3" (7.5cms) above centre front. (The photo below shows you how to do this). To check that you've got it right, place the pattern piece over your chest. The "v" should finish about 1" (2.5cms) higher than the bottom of your bra. Draw an additional line from the side of the pattern piece straight up to the shoulder. Fold your pattern piece along the new lines to cut your "v" layer or trace it off onto another piece of paper.
- All other pattern pieces are unmodified and should be cut as indicated in the pattern.

STEP 2: SEW ELASTIC TO THE INNER "V" LAYER
- Place some lengths of clear elastic along the inner edges of the "v" as shown in the first photo below using your double sided tape to keep the elastic in place.
- Fold the edges of the fabric over to encase the elastic and pin or secure with clips. You will need to make a small cut into the point of the "v" to help you fold that area.
- Stitch using a large zig-zag or stretch stitch as shown in the second photo below making sure you don't stretch the elastic as you sew.
- Finish the sides of your inner "v" layer with an overlocker/serger or zig-zag stitch (optional).


STEP 3: ATTACH THE WAISTBAND TO BODICE FRONT
- Fold your waistband in half wrong sides together lengthways and press.
- Match the middle of the long raw edges of the waistband to the centre front of your Bodice Front and pin or clip the fabric through all layers (see photo below).
- Sew using your overlocker/serger (or with a stretch stitch), stretching the fabric slightly as you sew to fit across the width.

STEP 4: GATHER SKIRT/PEPLUM TOPS AND ATTACH TO BODICE
- Gather and attach the Skirt Back to the Bodice Back.
- Gather and attach the Skirt Front to the inner "v" layer.
STEP 5: FINISH BODICE ASSEMBLY
- Pin your Bodice Front/waistband right sides together with your Bodice Back/Skirt Back (see first photo below).
- Pin the inner "v" layer/Skirt Front over the top right sides down (see second photo below).
- Sew the shoulder seams and side seams through all the layers and finish with your overlocker/serger or zig-zag stitch.
- Finish the neckband and hem following the sewing instructions in the pattern.


And that's it! Come over and join us in the Peach Patterns Sewing Group on Facebook to share pictures of your new dress or top.